Base prep is critical to the quality of paving. The majority of pavement failures are due to excessive distortion caused by a weak underlying base. An uneven or poorly compacted base can lead to inaccuracies in the mat because the screed operator is manually compensating for an inconsistent surface.
“Certainly prior to paving, base prep is critical,” says Chris Connolly, operator training specialist, Volvo Construction Equipment. “A well-graded or level surface is much easier for the paving contractor to work with. That’s why a lot of contractors choose to do their own base work—because then they know what they’re dealing with. It saves them time and money.”
Paver Setup
Smooth and level pavement surfaces are critical. In fact, many paving projects awarded by agencies across the United States and Canada include bonuses for achieving specified pavement surface smoothness. This is why it’s essential to visually inspect the paving machine and components to look for any issues that could affect operation or safety before the hot mix goes into the hopper.
Prior to start-up, check all fluid levels. Start up the paver and then check all gauges. Apply a release agent or coating solution to any components that come into contact with asphalt. This lubricant helps prevent asphalt from sticking to bare metal parts.
Some paver manufacturers have developed integrated coating systems that can be operated through the machine, as well as biodegradable lubricants. Volvo pavers, for example, utilize Blaw-Kote, an environmentally friendly protective coating system that can be used on the complete machine and if equipped can be applied to the tracks with the push of a button.
This coating should be applied to all areas that come in contact with asphalt, including the hopper, conveyors, auger, screed extensions, and end gates. This important step should be repeated throughout the day: before beginning operation, when switching mix types, and at the end of the workday.
Proper machine preparation and screed setup can save time and effort. Set up the screed paving components to the project specs—width, mat thickness, crown, or slope.
Factors Affecting the Screed
Pre-heat the screed to prevent mat sticking and dragging. A temperature range of 225°F–275°F is appropriate to prevent most material from sticking and causing damage to the screed plate, frame, and other parts often caused by excessive overheating.
“There is a misconception that hotter is better when it comes to heating the screed,” says Connolly. “If you’re overheating the screed, you’re putting immense wear on the machine, as well as using extra fuel.” Best practices call for the range of 225°F–275°F when using most common mixes.
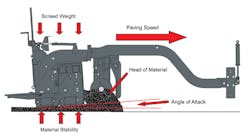
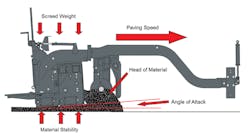
Establish the screed-plate “angle of attack” by rotating the depth cranks up or down to achieve the desired paving depth. The angle of attack determines the mat thickness. Adjusting the screed—raising or lowering—will increase or decrease the mat thickness (see figure on pg. 30). The mat depth is established by a project engineer who determines the estimated usage and traffic volume for the intended pavement.
Adjust augers to a minimum of 2 inches above the top of the mat to be paved. Most highway class pavers are equipped with adjustable auger height. “You want the auger slightly higher than the mat you’re laying so the auger isn’t digging into the material that’s passing under the screed,” says Connolly. “This will prevent shadowing, some other mat defects or a rough texture from occurring.”
Remove the slack between the paver tractor and screed by moving the paver ahead slightly until the screed moves in tow.
At this point, the material transport vehicle (MTV), dump truck, or belly dump and windrow elevator, supplies hot mix material to the hopper and the feed system is activated. A hopper that is at least one-third full of hot mix material at all times is ideal.
“Having the hopper at least one-third full gives you a little buffer,” says Connolly. “If you get below that level, you could run out of material very quickly. Then the screed will drop, you’ll have a hole in the mat and you’ll have to start over again.” Communication between the paver operator and truck driver is essential to maintaining an appropriate level of material in the hopper.
With setup complete and hot mix material in the hopper, paving can begin.
Laying a Quality Mat
On almost every asphalt paving project, the crew spends a few minutes to nearly an hour setting up equipment, depending on the condition of the equipment and the complexity of the project. Pavers, compactors, and MTVs must all be prepped for the long hours of use to help ensure uptime. Once the equipment is in use, the paving crew can fine-tune operations in order to lay the best quality pavement.
The two most important factors for laying a quality mat are all about consistency:
- Consistent head of material in front of the screed
- Consistent paving speed
Material Level
More than 95% of all material faults in asphalt paving are due to an improper head of material in front of the screed. The “head of material” is the mass of paving mix that lies directly in front of and spans the width of the screed. If the head of material in front of the screed fluctuates widely during the course of paving, it is nearly impossible to produce a level and smooth pavement surface.
“Too much or too little material affects how the screed rides and that translates to poor rideability,” says Connolly.
If the head of material increases, then more material is being forced under the screed, causing it to rise. This fluctuation in mat depth translates into a wavy surface. If the head of material decreases, there will be less material passing under the screed and supporting the weight of the screed. The screed will gradually drop, reducing the mat thickness and causing major flaws in the mat.
The correct head of material should be constant across the entire width of the screed. A good visual cue is whether the material is even with the center of the auger shaft. While monitoring material levels is the responsibility of the screed operator, many machines are now equipped with automatic feed systems that use sensors to automatically regulate the proper delivery and flow of material in front of the screed to ensure smooth and consistent paving.
Paving Speed
Paving speed also has an impact on the quality of mat. In an ideal paving operation, the paver would operate nonstop throughout the day, because a change in paving speed can directly affect the ability to lay a uniform mat.
When selecting a paving speed, several considerations should be made. These include the number and size of trucks, volume and output of the mixing plant, rolling and compaction rates and crew capabilities, plus the distance from the mixing plant to the paver. The hot mix material needs to arrive at the site hot to allow for proper laydown and compaction. It is important to select a speed that falls within the limits of these considerations. Once speed is selected, maintain it consistently. Ripples, waves, and irregular mat depth can occur when paving speed doesn’t remain relatively consistent.
Speed limiters are available on some paver models to control paving speed. The function is similar to cruise control for an automobile. A preferred paving speed is selected on the speed limiter—30 to 40 feet per minute, for example—and the paver is limited to that speed.
Changes in speed also create challenges with timing the delivery of hot mix material in order to keep the hopper at least one-third full. Consequently, changes in paving speed are commonly caused by trucks inconsistently arriving at the jobsite, or bumping the paver during the truck exchange. Even the smallest bump can create a depression behind and beneath the screed. Subsequent rolling may not fix this surface defect and can often be felt by traffic after the fact. To avoid negatively impacting the mat, truck drivers should stop 1–2 feet in front of the paver, allowing the paver to initiate contact.
Compaction
Compaction is an essential part of the road construction process. Without proper compaction or densification, the finished roadway will not provide the sufficient level of support needed for structures or traffic loads, and eventually a breakdown of material will occur.
There are three key factors that contribute to quality compaction:
- Mat temperature
- Mat depth or thickness
- Compactor rolling pattern
Mat Temperature
The first rule of compaction is to monitor mat temperature. Compaction must be accomplished while the mix has enough fluidity to allow aggregate particle movement in order to remove voids and excess air in the pavement structure. In some instances, the time available for compaction can be as limited as 10 minutes.
“The key is to not let the mat temperature get too low because then you can’t work with it,” says Wayne Tomlinson, compaction training specialist, Volvo Construction Equipment. “The roller operator needs to get on the mat as soon as safely possible after it is laid.”
The cooling of hot mix asphalt is predictable and can be anticipated based on prior experience and current ambient conditions. A compactor operator should keep notes on projects and different types of materials to determine best temperatures.
“When you find a temperature zone that gets your best density and smoothness, that’s the zone you need to work in all day,” says Tomlinson.
Mat Depth or Thickness
Thickness is an important compaction factor. Mat depth, or thickness, is established by a project engineer who determines the estimated usage and traffic volume for the intended pavement. It is initially part of the paving crew’s responsibility to set the correct angle of attack, but compaction plays a role in the “finished” mat thickness.
“There’s a 20 to 25% rule of thumb when it comes to compacting the right thickness,” says Tomlinson. “So if you want a 2-inch mat, the paver would lay a 2.5-inch mat. The roller would compact it and the finished mat is 2 inches thick.”
Rolling Pattern
Once an ideal mat temperature has been reached, it’s essential to complete rolling before the mix temperature drops too low to achieve target density. This practice accomplishes two objectives: it allows the highest production to be achieved, and for mixes exhibiting tenderness, proper breakdown rolling density can be reached before the mix becomes unstable, or develops a tender zone.
Make the first pass with the compactor, rolling in a slight arc toward the center of the panel, maintaining a safe distance behind the paver and crew. Stop forward motion on a slight angle to prevent bumps and depressions in the pavement.
“If you stop straight and back up, you’ll leave a dip across the mat. And as you pass straight through or stop in that same spot, you’ll make a bigger dip. If you stop at a slight angle, the next pass will roll through the angled stop and it will roll out,” says Tomlinson. “You want to always stagger your stops down the mat so you’re not stopping in the same place.”
The pass on the left side stops in an arc and the compactor returns on the same path. The next forward pass is on the right side, crossing over the previous forward pass by angling toward the center of the panel. Change direction slowly to avoid pushing or shoving the mat, which can also result in pavement imperfections, such as dips and bumps.
Roll to the end of each subsequent pass beyond the end of the adjacent and previous pass. Following the forward motion of the paver keeps the compactor in the same relative mat temperature range as the paver. Limiting the length of the rolling zone also helps the compactor keep up with the paver. In order to minimize risk for the compactor operator and the paver crew, the compactor should maintain a minimum distance of 50 feet behind the paver.
Safety
Each year, nearly 1,000 road construction workers are fatally injured on the job. More than half are related to construction vehicles and heavy equipment operating within work zones. These statistics emphasize the importance of implementing and strictly adhering to general safety practices and formal training programs as part of any road paving project.
The following measures and procedures form the basis of road paving safety. Manufacturer and frequent industry association training programs are also recommended.
- Never operate a machine unless you are trained and qualified.
- Ensure proper visibility of personnel and work zone, especially if paving at night.
- Become familiar with the jobsite layout.
- Maintain a 50 foot distance between the paver and roller compactor.
- Exercise caution when entering and existing machines—use a three-point mount.
- Keep operator area free of tools and debris.
- Limit the number of crew members on the paver—one paver operator and two screed operators is ideal.
- Never operate a roller with more than the operator on the machine.
- Wear proper protective gear—hard hats, safety vests, and safety glasses—and avoid loose or baggy clothing.
The best practice for safety is to take advantage of training programs, such as Road Institute. The paving industry’s premier training program, Road Institute has been providing practical instruction and hands-on learning to road building industry professionals for more than 50 years. Courses are conducted by professional instructors—including Connolly and Tomlinson—who are focused on helping paving contractors and those in the paving industry maximize productivity through various paving and compaction best practices, as well as machine performance and maintenance.
“Our job is to get people to apply best practices in order to get the best end result—a high-quality paving job with the least amount of wear and tear on their machines,” says Tomlinson.
Road Institute is currently offering two- to five-day training sessions through May 2015. Registration is open to all paving professionals, regardless of paver brand. The 2015 schedule and course descriptions can be viewed at www.roadinstitute.com.
In the road building industry, knowledge is power. Precision and efficiency don’t come from equipment alone—people make the difference.


